Setup instructions for Chromebook manual enrollment
This article provides the general steps to onboard BYOD Chromebooks
After setting up the NetID Web Portal in Foxpass, we can download and install the setup on a Chromebook manually. Here are the steps:
- On a Chromebook, open Chrome browser > Go to Foxpass BYOD page > Click on the download link in the green alert box.

Sample BYOD download link
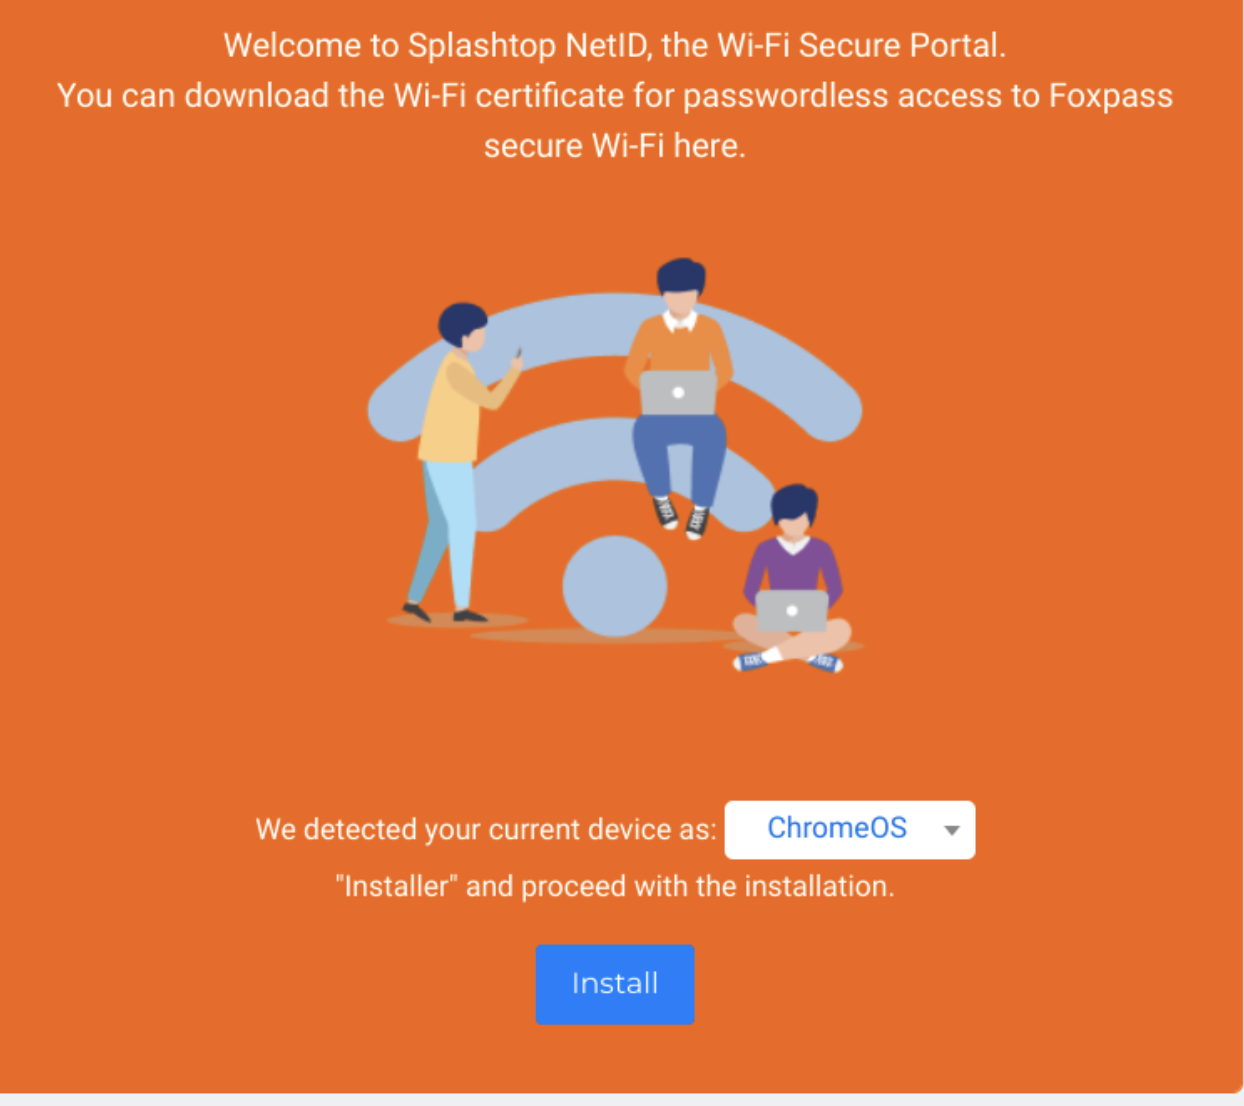
- It will detect OS as the ChromeOS. Click 'Install' to proceed.
Click Install
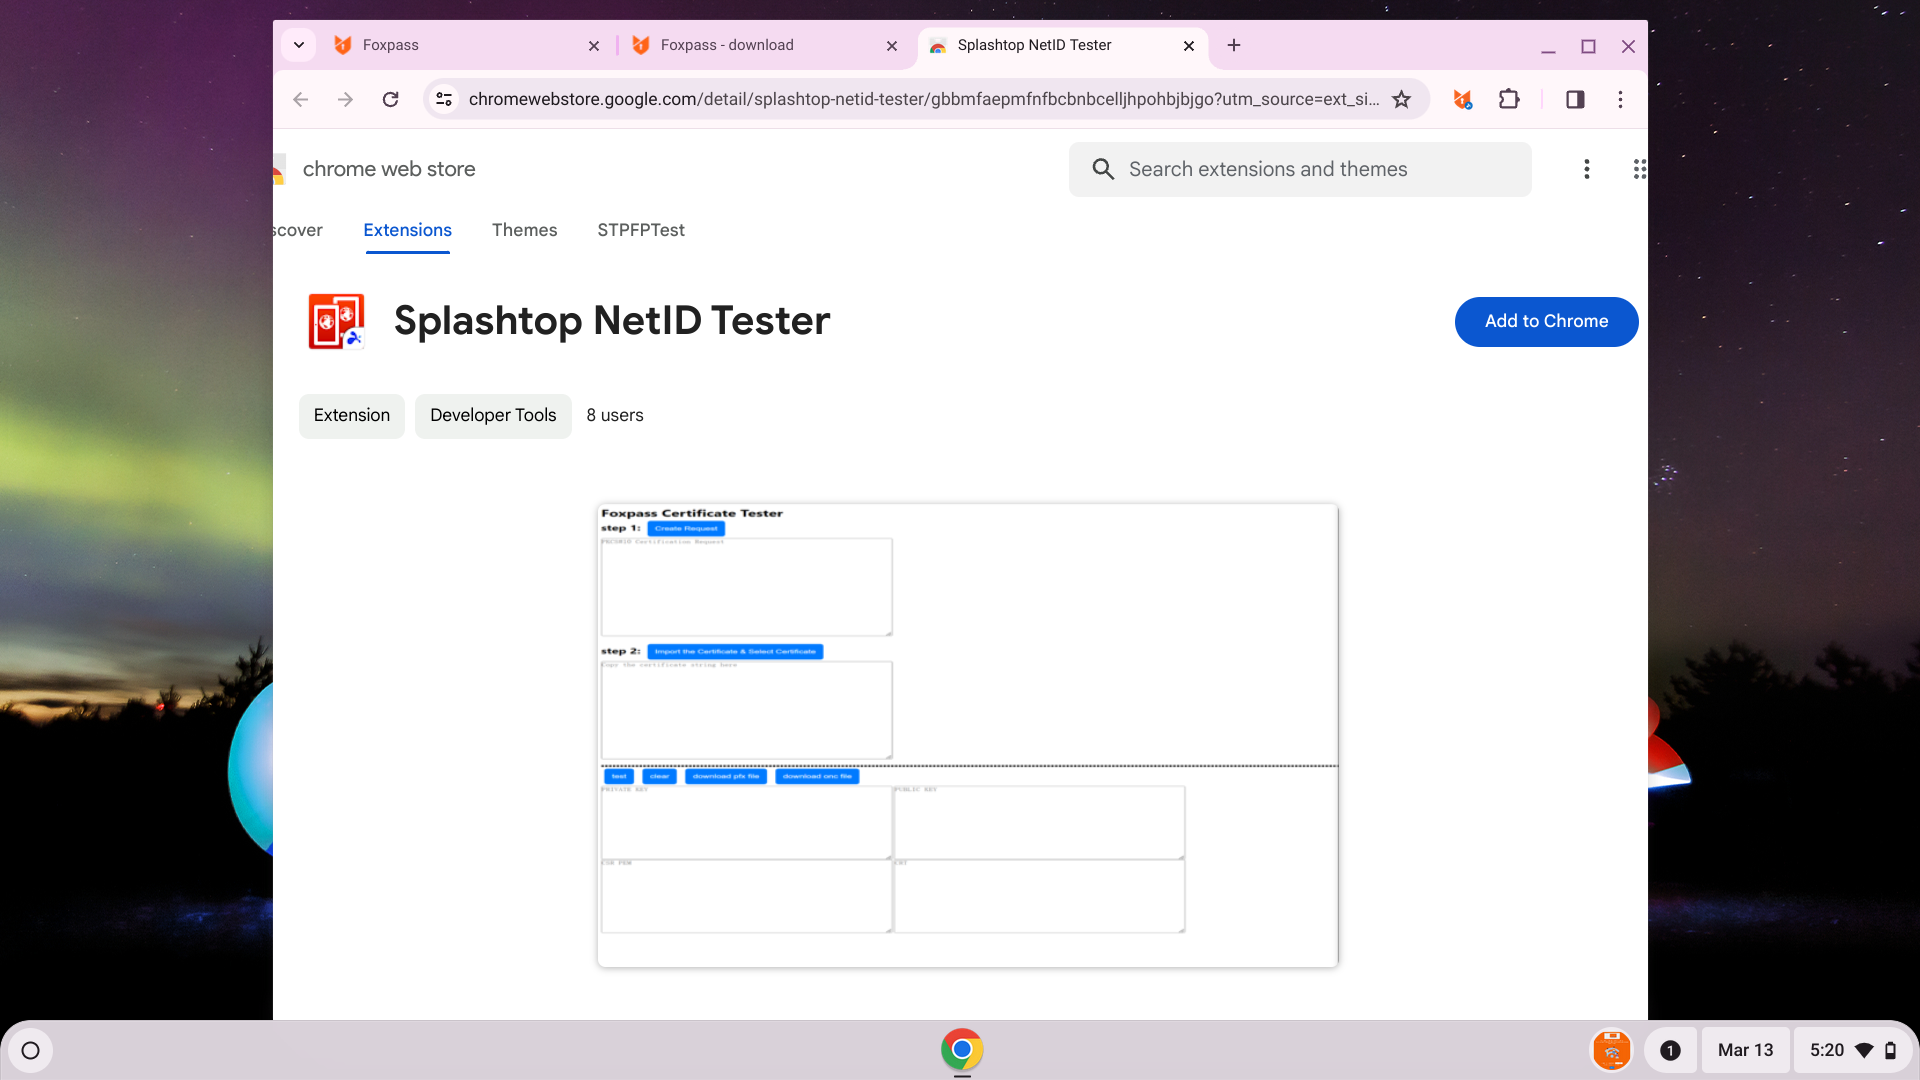
- It will open the Chrome web store in a separate tab to guide the user to install the extension, click 'Add to Chrome' to proceed.
Click Add to Chrome button
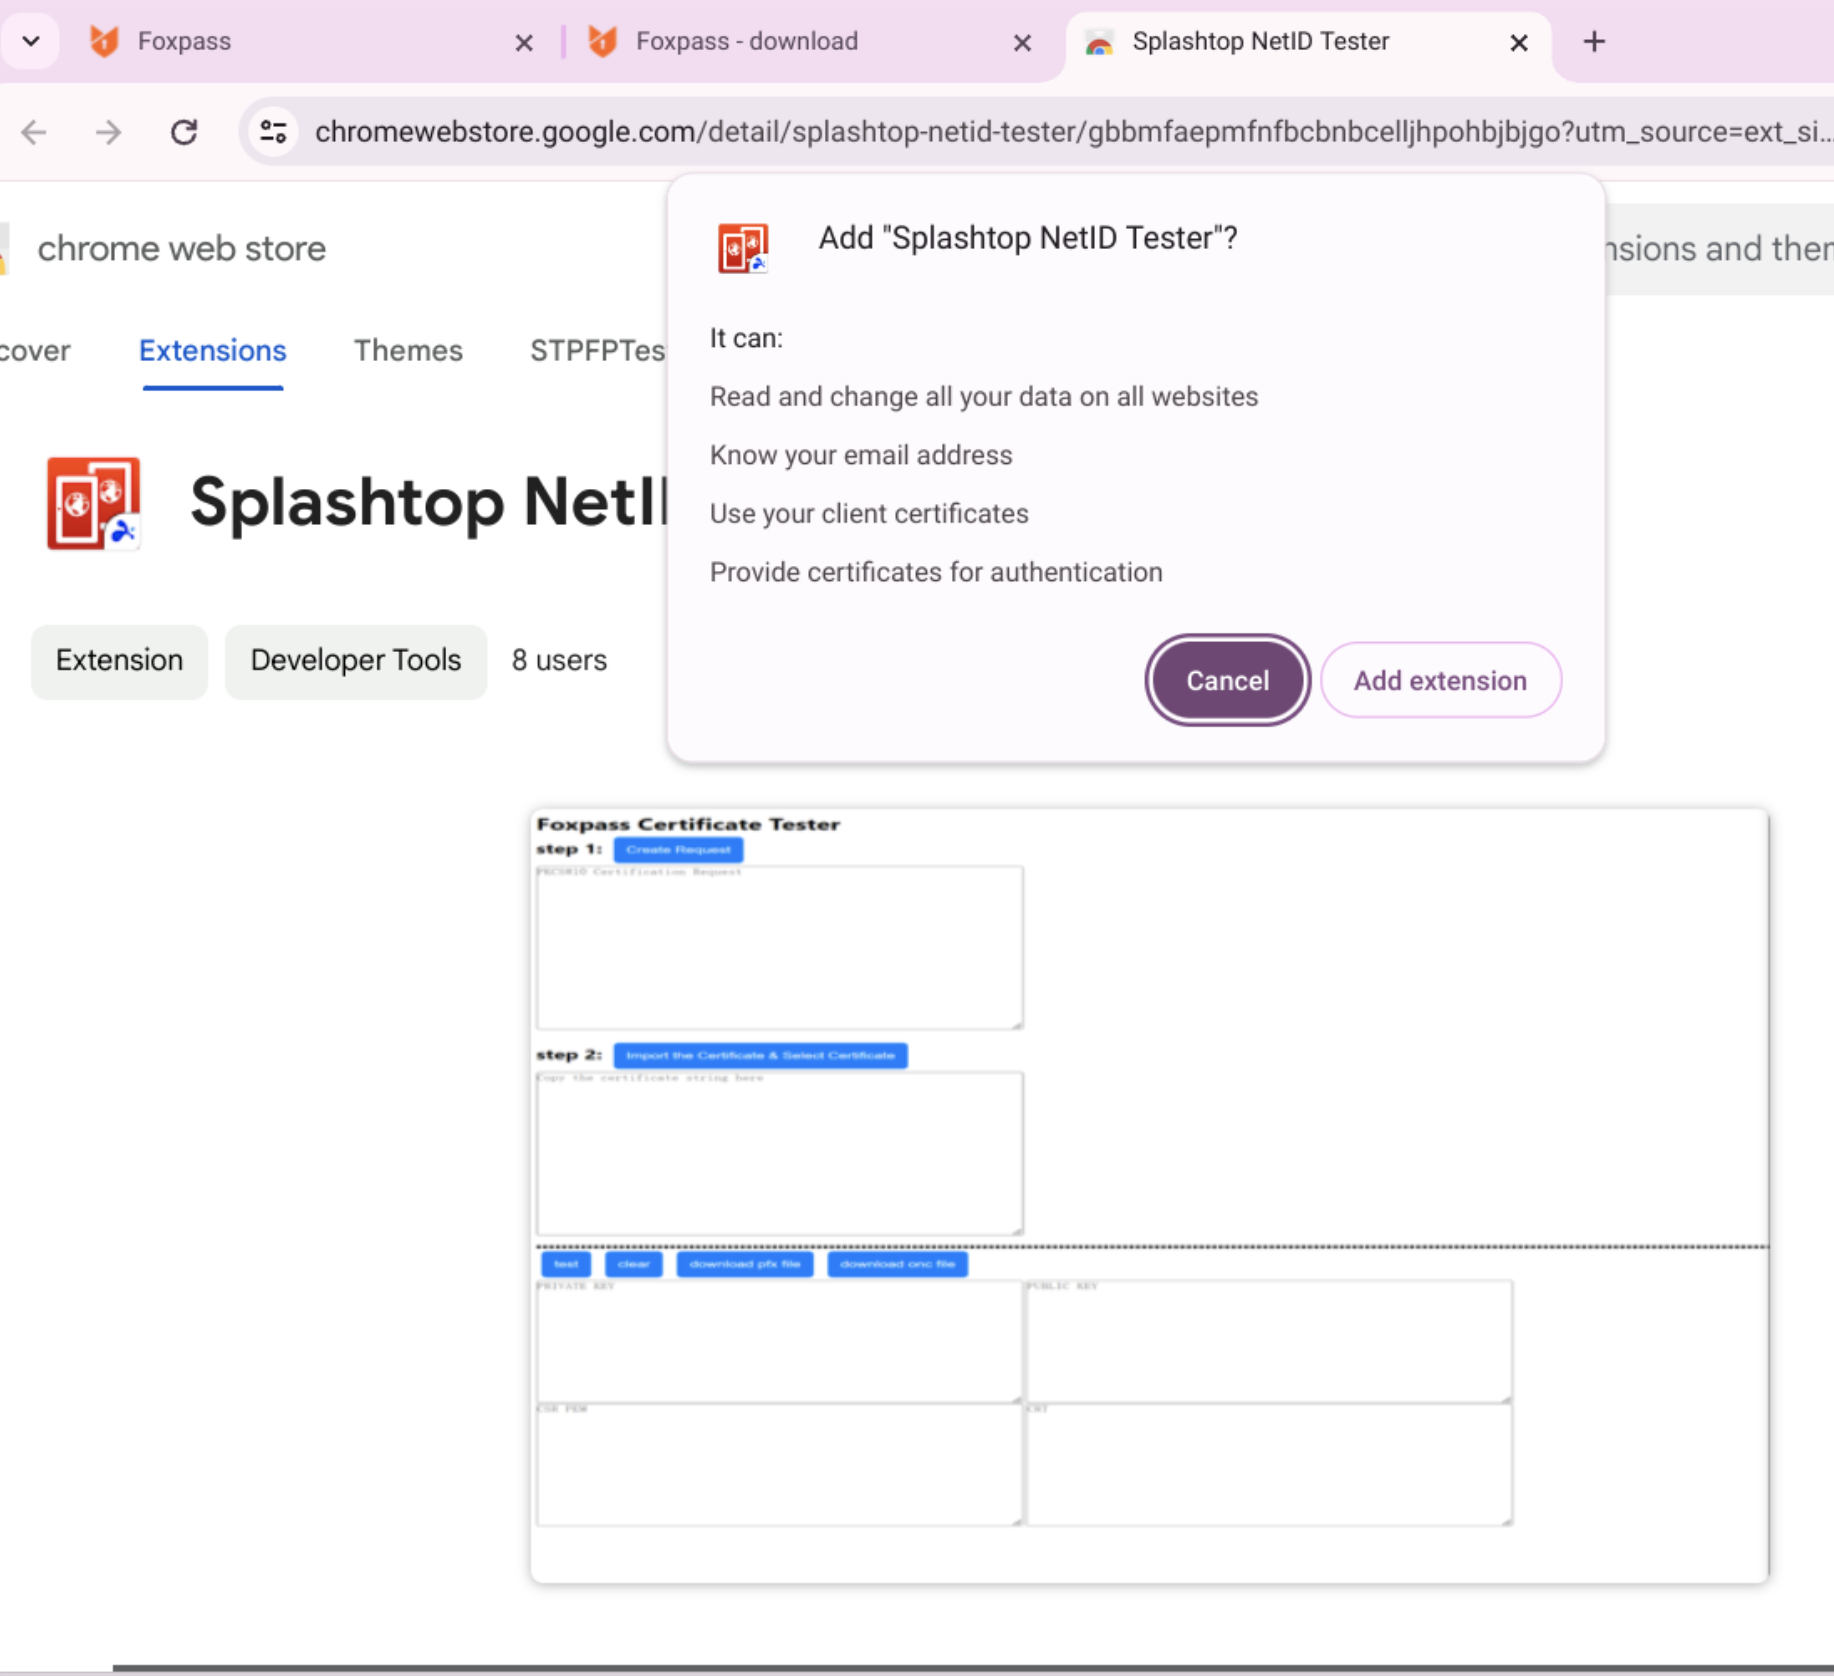
- It will show a box and ask if you want to add extension. Click Add extension.
Add extension
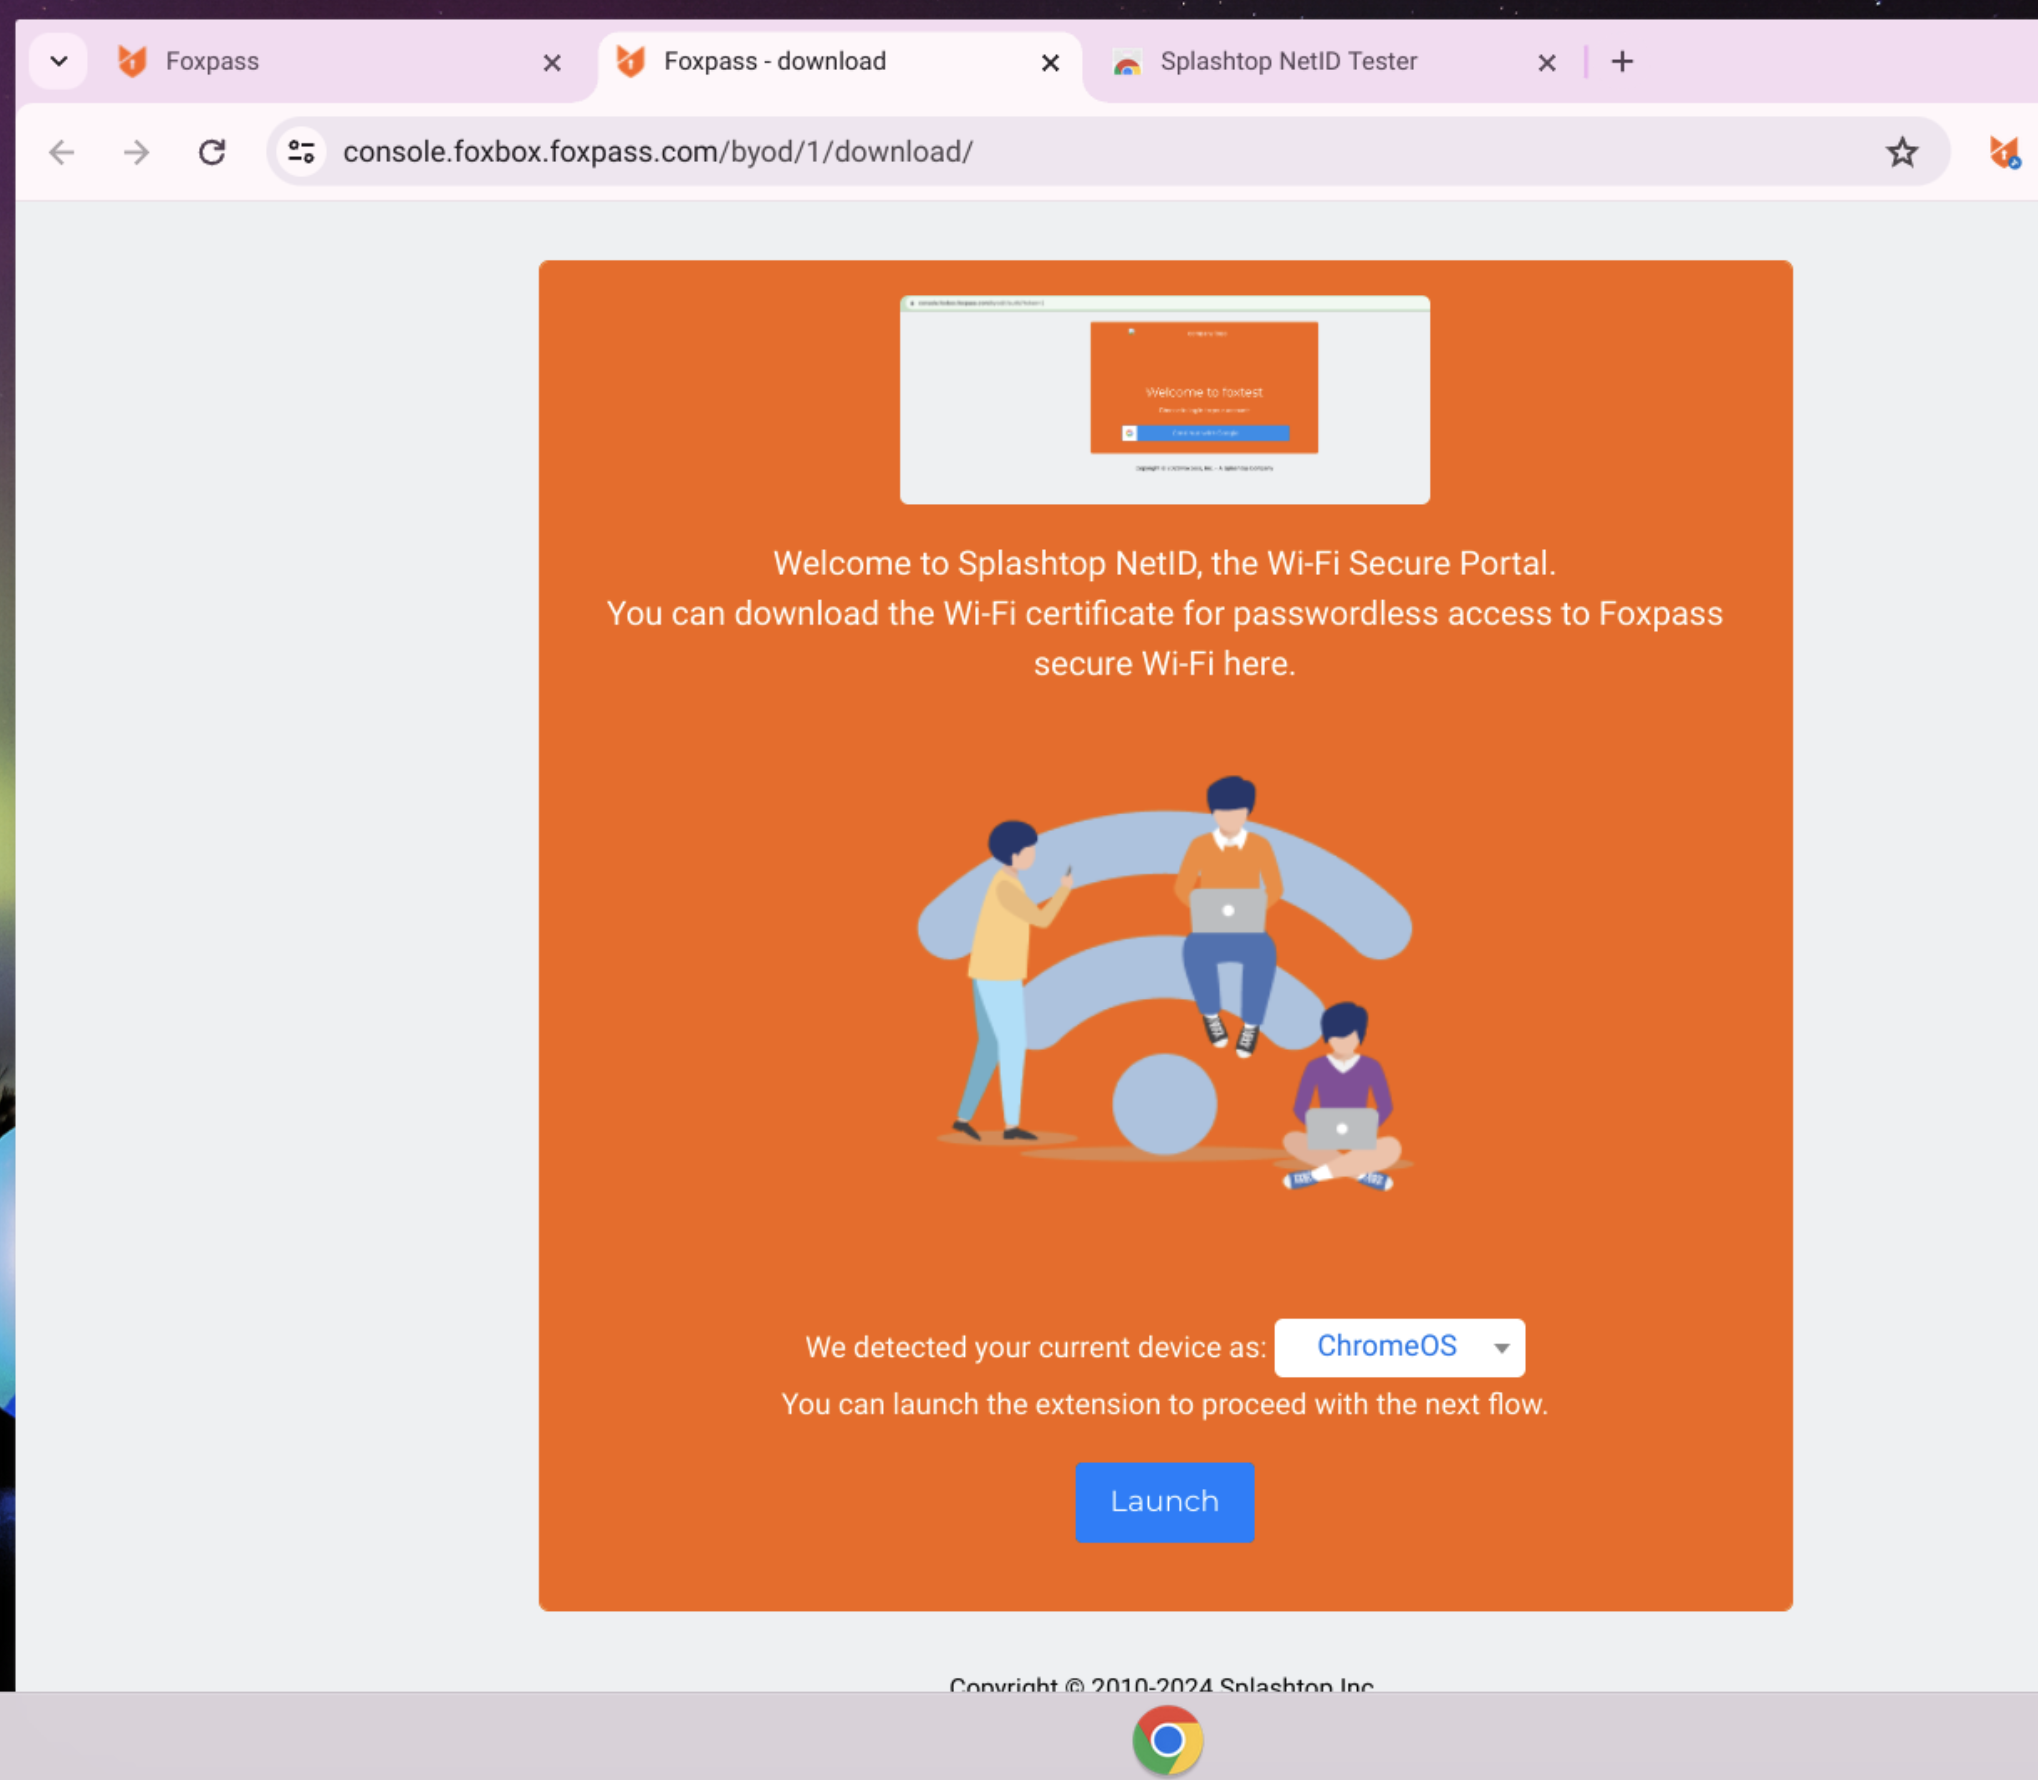
- Go back to the Foxpass. The page will detect that installation of NetID is finished and Click 'Launch' button to proceed.
Click Launch
- In the extension page, click 'Sign in'.
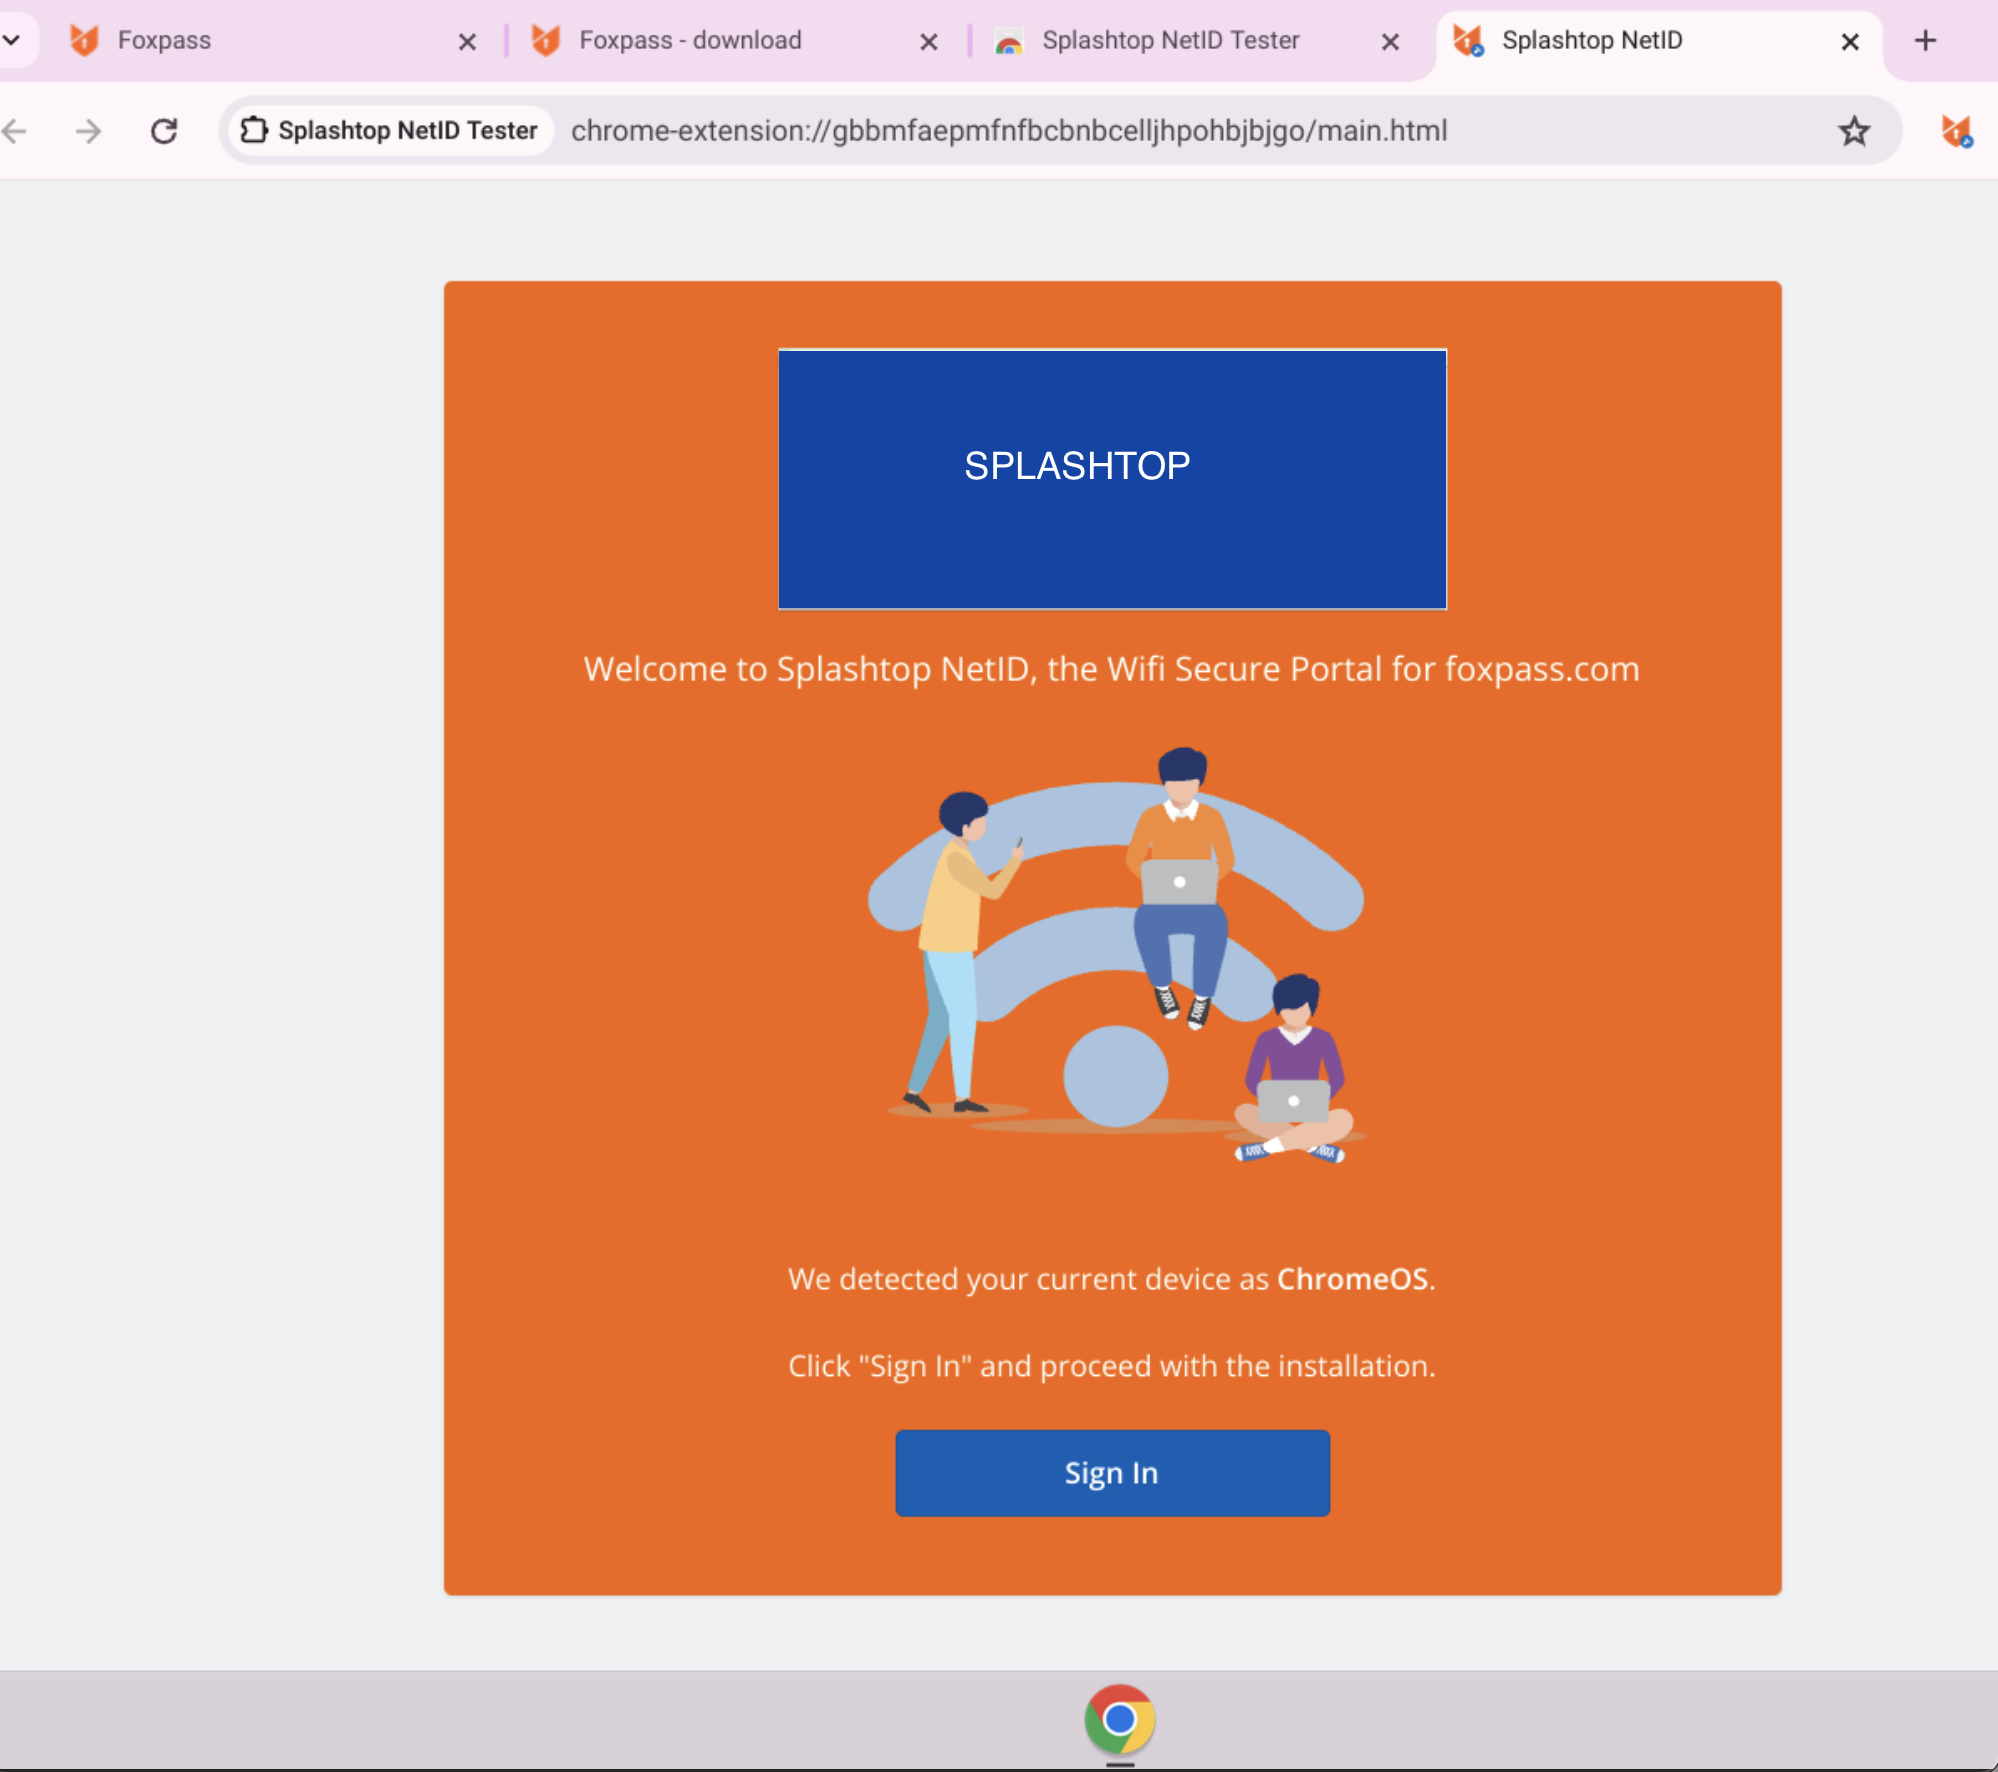
Click Sign in
- The authentication page will close automatically.
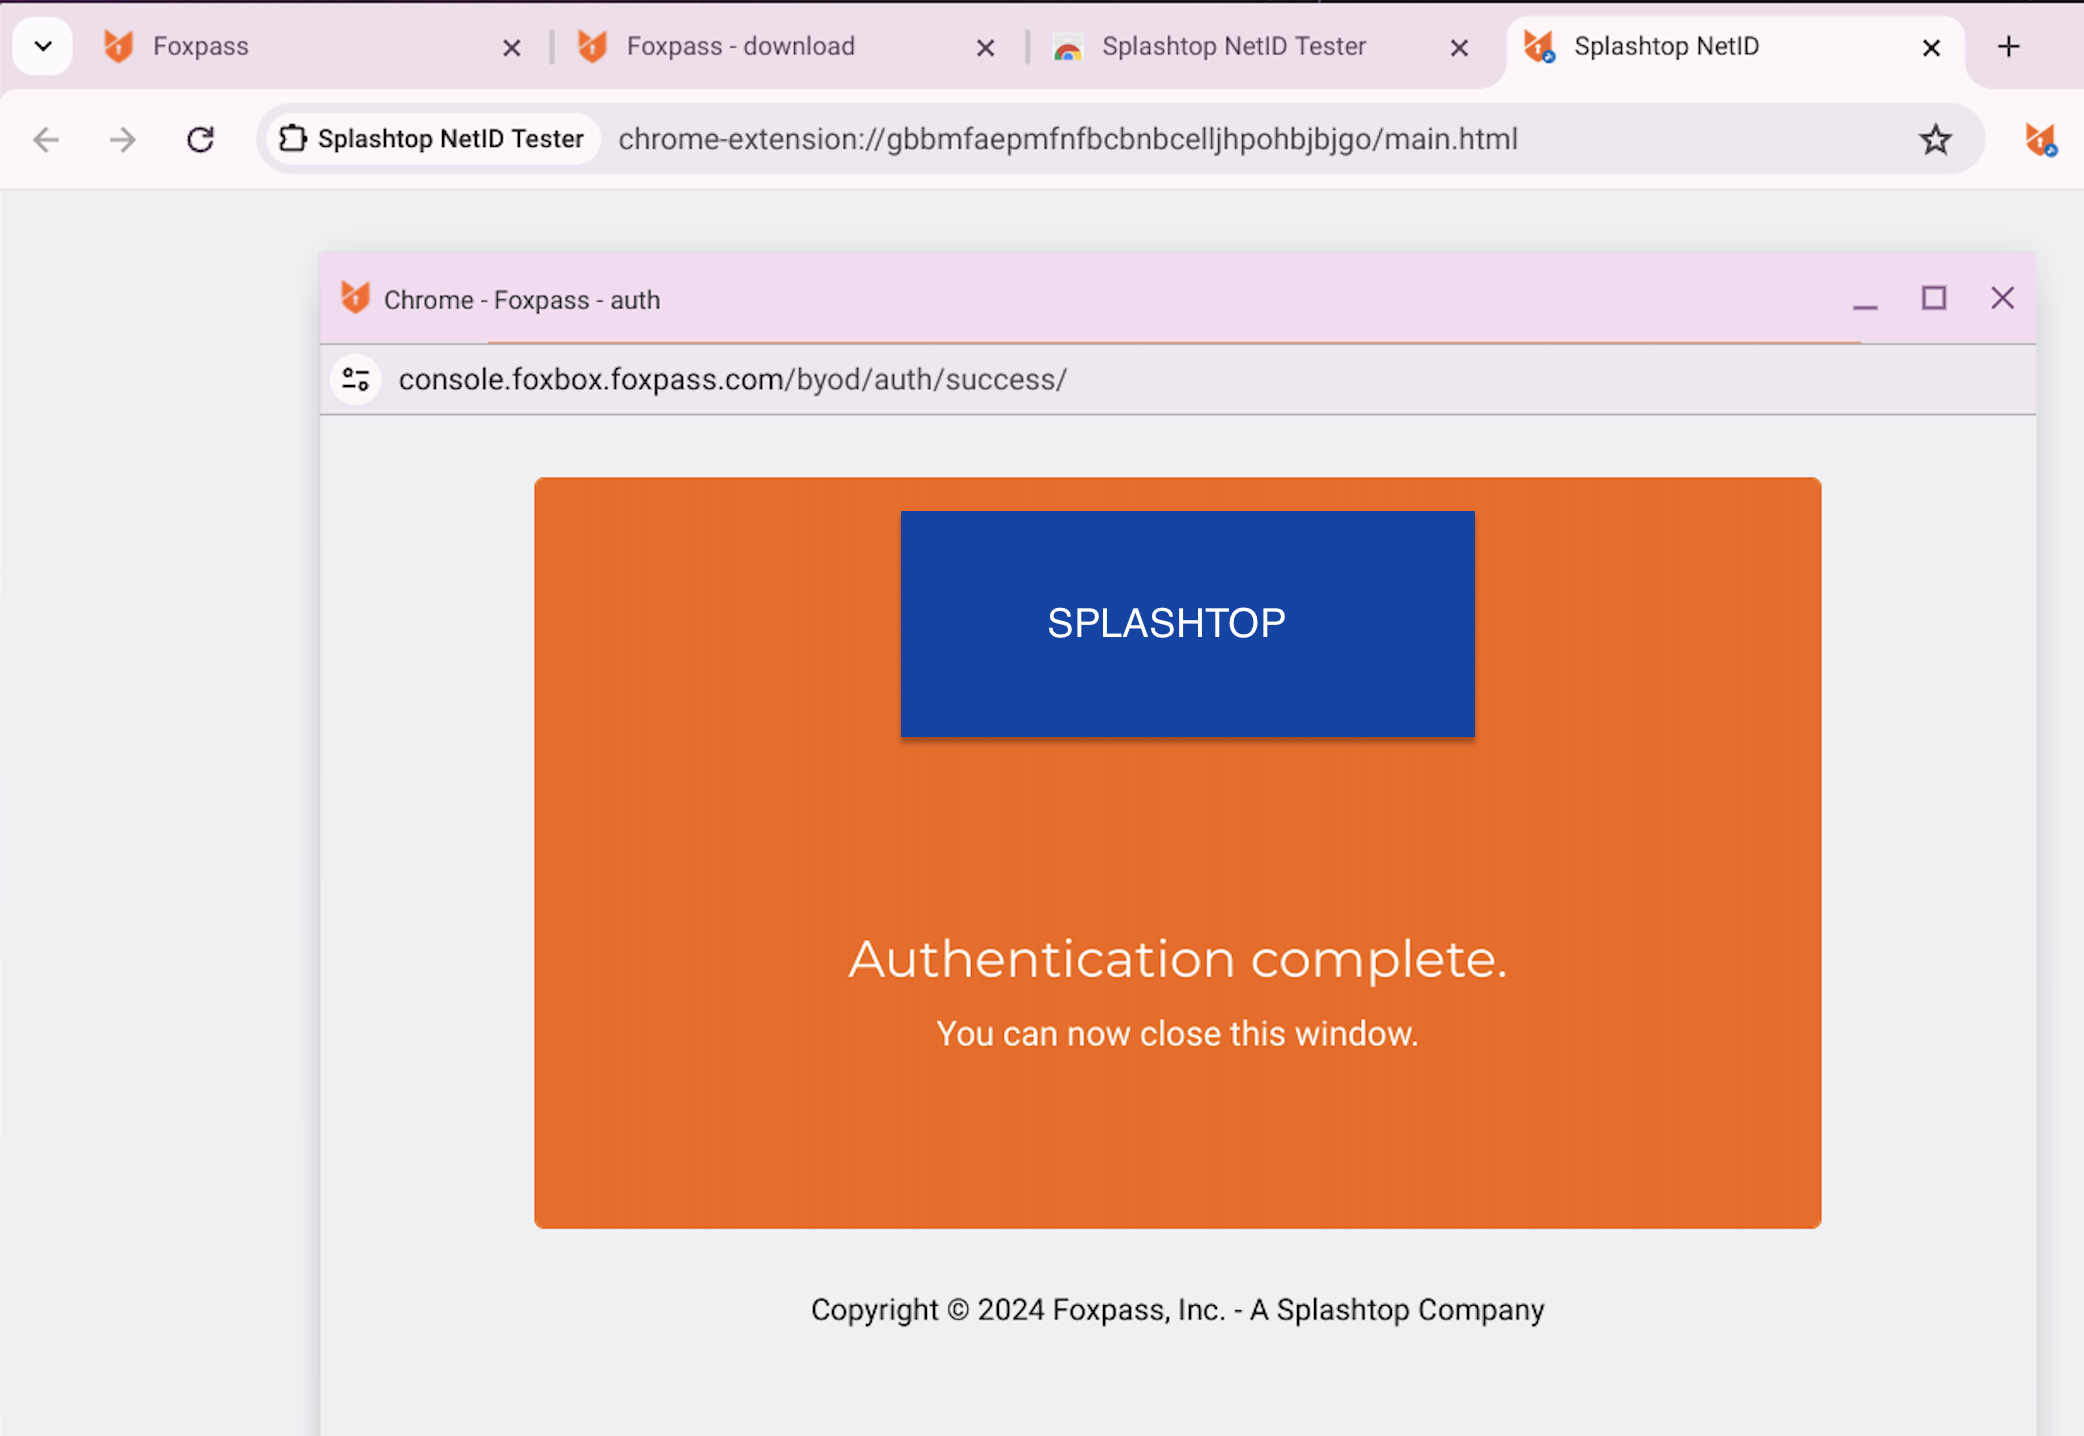
Authentication complete
- Download .ONC(Open Network Configuration)
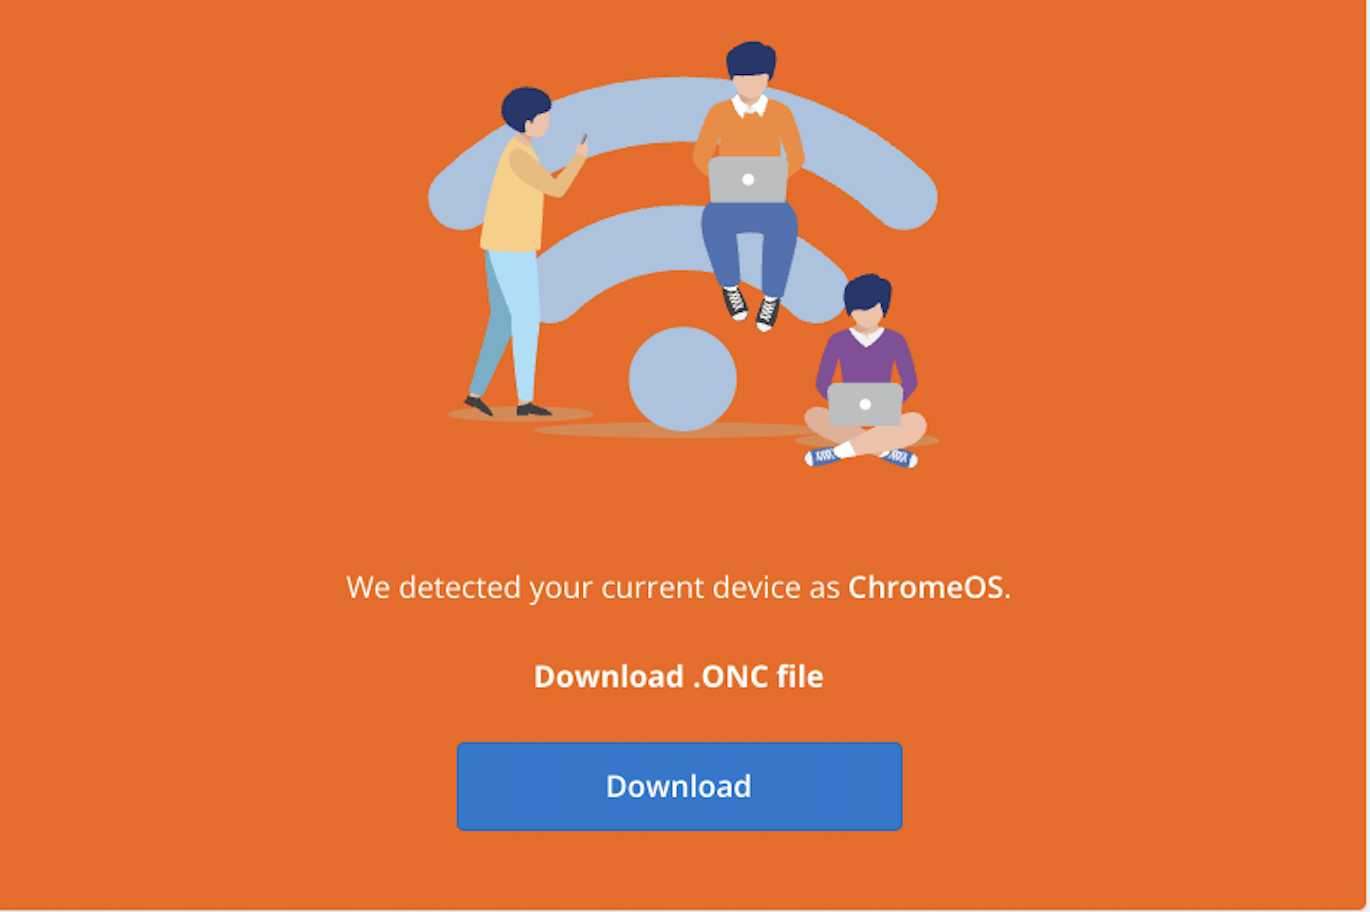
Download .ONC file
- Go to chrome://network. Under Import ONC file > Click Choose File > Upload the downloaded file in previous step.
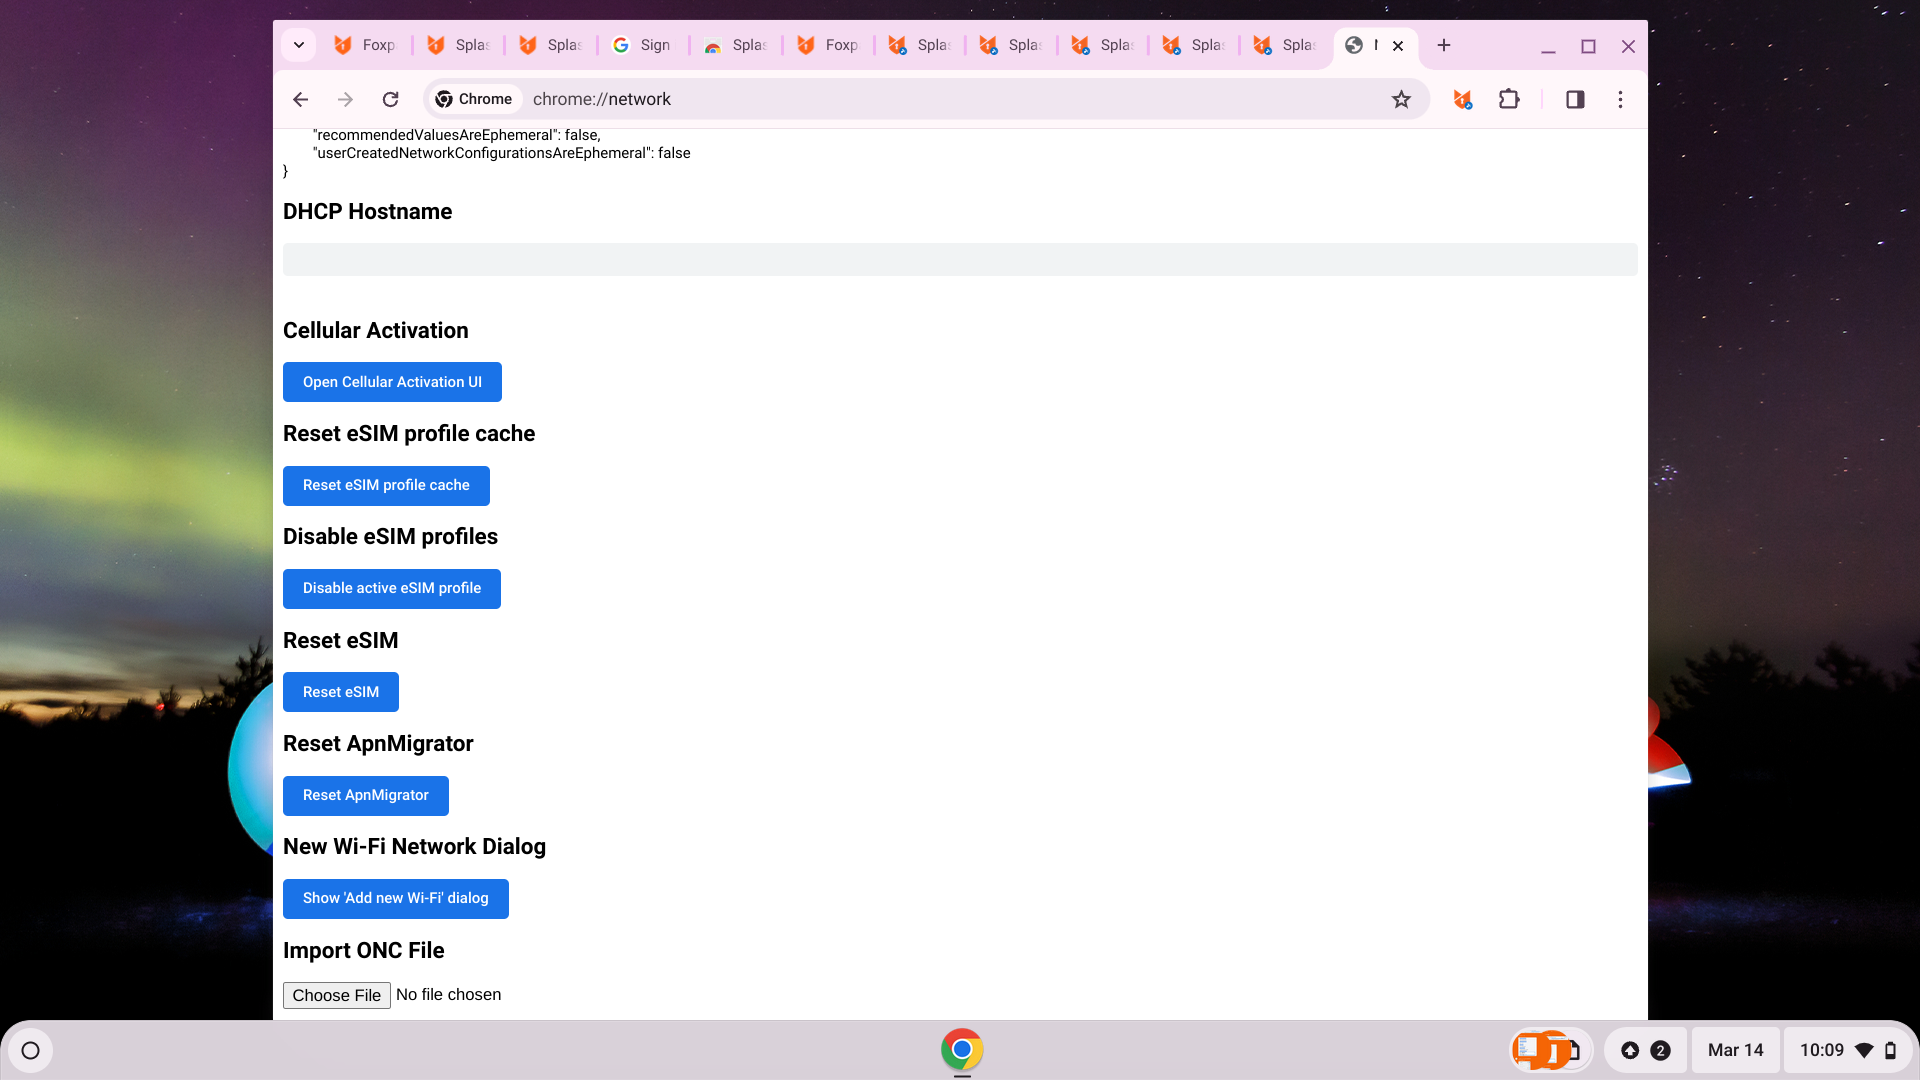
Import .ONC file
- If everything is configured correctly, you can connect successfully to your SSID.
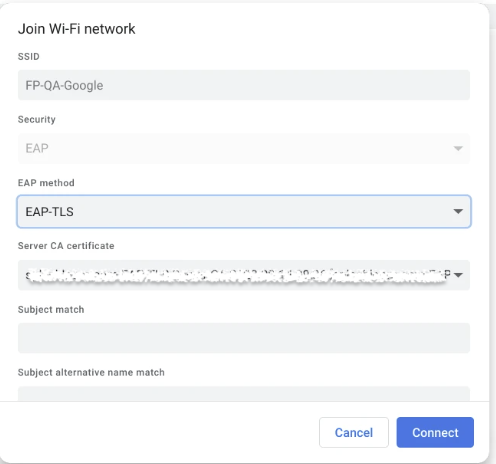
Connect to your SSID
Updated about 1 month ago